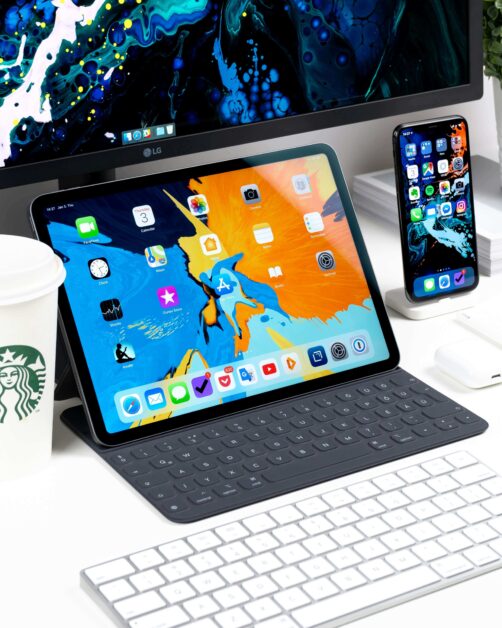
In today’s interconnected digital world, Apple’s ecosystem stands out for its seamless device integration, primarily through iCloud. This cloud-based service syncs your data across all your Apple devices, ensuring that your photos, contacts, calendars, and more are up-to-date, regardless of which device you’re using. While this feature is incredibly convenient, there are times when you might want to unsync your iPhone from your iPad. Whether it’s due to privacy concerns, storage management, or simply preferring your devices to operate independently, this guide will walk you through the process of unsyncing your iPhone from your iPad, ensuring you have full control over your digital life.
Reasons to Unsync Your iPhone from Your iPad
There are several compelling reasons why one might decide to unsync their iPhone from their iPad. This decision often stems from a desire to manage digital life more effectively or address specific concerns:
- Privacy Concerns: Keeping sensitive information such as personal messages, photos, and documents separate can enhance privacy, especially if the iPad is used by multiple family members or friends.
- Storage Management: By unsyncing, you can better manage the storage on both devices, ensuring that each has only the necessary data and apps, thus optimizing performance and space.
- Separation of Personal and Work Devices: Having distinct personal and work devices can help maintain a healthy work-life balance. Unsyncing aids in delineating these boundaries by ensuring work-related notifications and data do not appear on personal devices.
- Customized Device Usage: Unsyncing allows for a more tailored use of each device, enabling users to install specific apps or save particular files on one device without automatically syncing these choices to another.

These reasons highlight the benefits of managing devices independently, allowing for greater control over data, privacy, and the overall user experience.
How to Unsync iPhone from iPad: Step-by-Step Guide
To unsync your iPhone from your iPad, it’s essential to follow a detailed, step-by-step process to ensure that your devices no longer mirror each other’s data through iCloud. This guide will help you manage your devices independently, providing a clearer separation of your digital activities.
1. How to Unsync Specific Apps and Services via iCloud
Step 1: Access iCloud Settings
- Open Settings: On your iPhone or iPad, launch the Settings app.
- Tap on Apple ID: At the top of Settings, you’ll see your name/Apple ID. Tap to enter.
- Select iCloud: This is where you’ll find a list of apps and services currently synced through iCloud.
Step 2: Manage App Sync Settings
- Within the iCloud menu, you’ll see a list of apps like Mail, Contacts, Calendars, Reminders, Safari, and Photos, among others.
- Toggle Off Apps: To unsync a specific app, simply toggle the switch next to it to the off position. This action stops the app from syncing its data across your devices via iCloud.
Step 3: Managing Documents and Data
- For apps that use iCloud to store documents and data, such as Pages, Numbers, and Keynote, scroll down to the “iCloud Drive” option.
- Access iCloud Drive Settings: Tap on “iCloud Drive” to see a list of apps that store data in iCloud.
- Toggle Off to Unsync: Find the app(s) you wish to unsync and toggle the switch next to each app to stop syncing their data across devices.
Step 4: Photos and iCloud Library
- If you wish to unsync your photos, go back to the main iCloud settings menu.
- Select “Photos”: Here you have the option to turn off “iCloud Photos” by toggling the switch, which will stop syncing your photo library across devices.
Step 5: Sign Out of iCloud (Optional)
- For a more comprehensive separation, consider signing out of iCloud entirely on a device.
- Scroll to the Bottom: At the bottom of the Apple ID menu, you’ll find the option to sign out.
- Sign Out: Keep in mind, signing out will remove access to iCloud services and may delete iCloud data from your device, depending on your chosen settings during the sign-out process.
2. How to Stop Text Messages from Appearing on iPad
Disable Text Message Forwarding
- On Your iPhone: Open the Settings app.
- Navigate to Messages: Scroll down and tap on “Messages” to access your message settings.
- Text Message Forwarding: Within the Messages settings, look for the “Text Message Forwarding” option and tap on it.
- Select Your iPad: You will see a list of devices linked to your Apple ID that can receive SMS texts. Your iPad should be listed here.
- Toggle Off: Find your iPad in the list and toggle the switch to the off position. This action will stop SMS texts from being forwarded to your iPad.
Sign Out of iMessage on iPad
If you want to ensure that no messages appear on your iPad, including iMessages, you can also sign out of iMessage on the iPad directly.
- On Your iPad: Open the Settings app.
- Go to Messages: Find and tap on “Messages.”
- Tap on “Send & Receive”: This option will show you the Apple ID associated with iMessage on your iPad.
- Sign Out: Tap on your Apple ID and then select “Sign Out” to remove your account from iMessage on the iPad.
Adjust iCloud Settings (Optional)
If you’re using iCloud Messages (Messages in iCloud), you might also want to adjust these settings to control which messages are stored and available on your iPad.
- On Your iPad: Open the Settings app and tap on your Apple ID at the top.
- Navigate to iCloud: Select “iCloud” from the Apple ID menu.
- Manage iCloud Settings: Look for “Messages” in the list of apps using iCloud and toggle it off if you prefer not to have your messages stored and synced via iCloud.
3. How to Stop Phone Calls from Ringing on iPad
Turn Off Calls on iPhone
- On Your iPhone: Open the Settings app.
- Navigate to Phone: Scroll down and tap on “Phone” to access your phone settings.
- Calls on Other Devices: Within the Phone settings, you will find an option labeled “Calls on Other Devices.” Tap on it to view devices that can receive calls made to your iPhone.
- Disable Your iPad: In the “Calls on Other Devices” menu, you’ll see a list of devices where your iPhone calls can be answered. Find your iPad in the list and toggle the switch next to it to the off position. This action will stop your iPad from ringing when you receive phone calls on your iPhone.
Adjust FaceTime Settings on iPad
If your iPad is still ringing for incoming calls, it might be due to FaceTime settings, especially if these calls are coming via FaceTime audio.
- On Your iPad: Open the Settings app.
- Go to FaceTime: Scroll down and tap on “FaceTime.”
- iPhone Cellular Calls: Look for the option “iPhone Cellular Calls” or “Calls from iPhone” (the naming might vary depending on your iOS version) and toggle it off. This will prevent your iPad from ringing when you receive cellular phone calls on your iPhone.
Sign Out of FaceTime (Optional)
For a more drastic measure, you can sign out of FaceTime on your iPad. This step will ensure that no FaceTime calls, audio or video, can be received on your iPad.
- Open FaceTime Settings: On your iPad, go to Settings and tap on FaceTime.
- Sign Out: Tap on your Apple ID at the top and choose “Sign Out.” This will remove your account from FaceTime on your iPad, stopping it from receiving any calls.
4. How to Unsync Automatic App Downloads on iPad
Adjust Settings on iPad
- Open Settings App: Start by opening the Settings app on your iPad.
- Tap on Your Apple ID: At the top of the Settings menu, tap on your Apple ID name to access your Apple ID settings.
- Select iTunes & App Store: This option allows you to manage settings related to purchases and downloads from the iTunes Store and App Store.
- Automatic Downloads: Look for the “Automatic Downloads” section. Here, you will see switches for various types of content, including Music, Apps, Books & Audiobooks, and Updates.
- Toggle Off Apps: To stop your iPad from automatically downloading apps you purchase on other devices, toggle the switch next to Apps to the off position. You can also turn off updates if you prefer to manually manage app updates on your iPad.
Considerations for Family Sharing
If you’re part of a Family Sharing group, any purchases made by family members can also automatically download to your devices, depending on your settings.
- To manage this, still within the iTunes & App Store settings, ensure the “Apps” toggle under Automatic Downloads is off. This prevents apps purchased by family members from automatically downloading to your device.
Manage Cellular Downloads
For those concerned about data usage, there’s also an option to allow or disallow automatic downloads over cellular data:
- Below the Automatic Downloads toggles, you’ll find the “Use Cellular Data” option. Turning this off can save data by ensuring that automatic downloads only occur over Wi-Fi connections.
5. How to Disable iCloud Photo Library on iPad
- Open Settings: On your iPad, start by opening the Settings app.
- Tap on Your Apple ID: At the top of the settings menu, tap on your name to access your Apple ID settings.
- Select iCloud: This will take you to the iCloud settings page where you can manage your iCloud storage and the apps that use iCloud.
- Manage Photos Settings: Find and tap on “Photos” in the list of apps using iCloud.
- Toggle Off iCloud Photos: You will see a toggle for “iCloud Photos.” Turn this off to stop syncing your photo library with iCloud. This action prevents new photos and videos from your iPhone from updating automatically on your iPad.
Considerations
- Photo Stream: If you also have “My Photo Stream” enabled, consider turning it off if you don’t want any new photos to appear on your iPad. “My Photo Stream” uploads your recent photos and makes them accessible on all your devices, but it doesn’t use your iCloud storage.
- Optimize iPad Storage: If “Optimize iPad Storage” was selected, full-resolution photos and videos might still be stored in iCloud even after turning off iCloud Photos. You’ll only see optimized versions on your iPad, but originals can be downloaded from iCloud at any time.
- Download and Keep Originals: If you switch to “Download and Keep Originals” before turning off iCloud Photos, your iPad will retain the original, full-resolution photos and videos, even after you disable iCloud Photos. Make sure you have enough storage on your iPad for this option.
Disabling iCloud Photo Library on iPhone
If you also wish to stop your iPhone from uploading photos and videos to iCloud, thereby preventing them from syncing across devices altogether, follow the same steps on your iPhone to toggle off “iCloud Photos.”
Alternative Methods to Share Data Between Devices Without Syncing
In the digital age, the necessity for efficient data sharing across devices is undeniable. While syncing offers one pathway, privacy concerns and storage limitations often necessitate alternative solutions. Below, we delve deeper into AirDrop and two leading third-party cloud services, providing a comprehensive overview of their capabilities, advantages, and potential drawbacks.
1. AirDrop
Exclusive to Apple’s ecosystem, AirDrop allows for the seamless wireless transfer of files between iOS and macOS devices. Utilizing Bluetooth for device discovery and Wi-Fi for data transfer, AirDrop simplifies sharing photos, videos, contacts, and even websites.
- No setup required; uses existing Apple ID.
- Automatic encryption for secure file transfer.
Pros:
- Intuitive use within the Share menu across apps.
- Does not compress or reduce the quality of shared files.
Cons:
- Operates only within Apple’s platform, excluding interoperability with Windows or Android devices.
- Transfer success can be inconsistent depending on device proximity and environmental factors.
2. Dropbox
As a pioneer in cloud storage, Dropbox facilitates file storage, synchronization, and collaborative work across any device with internet access. Its platform independence makes it a versatile choice for users with diverse device ecosystems.
- Easy link sharing for files and folders, with controlled access permissions.
- Offline access to files and an option for automatic photo upload.
Pros:
- Robust third-party app integrations, enhancing productivity.
- Strong track record of platform stability and reliable file syncing.
Cons:
- Higher-tier plans can be costly for individuals or small teams seeking more storage.
- Collaboration features, while extensive, can be less intuitive than those of newer competitors.
3. Google Drive
Integrating deeply with Google’s suite of productivity apps, Google Drive stands out for its generous storage offering and comprehensive collaboration tools. It’s a go-to solution for sharing documents, spreadsheets, and slideshows, making real-time collaboration effortless.
- Advanced search capabilities leveraging Google’s search technology.
- Strong sharing controls, including view, edit, and comment permissions for shared files.
Pros:
- Direct integration with Gmail and Google Photos, offering a unified Google ecosystem experience.
- Supports a wide range of file types, not limited to Google’s own formats.
Cons:
- Users report occasional sync errors and conflicts, especially with large numbers of files.
- The interface, while clean, can require a learning curve for effectively managing file organization and sharing settings.
Troubleshooting Common Issues When Unsyncing iPhone from iPad
When you decide to unsync your iPhone from your iPad, the process is usually straightforward. However, you might encounter a few hiccups along the way. Here are some common issues and their solutions to ensure a smooth unsyncing experience:
- Data Still Syncing After Unsyncing: Sometimes, even after you’ve followed the steps to unsync your iPhone from your iPad, you might notice that some data is still syncing. This could be due to settings that were not correctly applied or iCloud services that continue to run in the background. Double-check the iCloud settings on both devices to ensure that all the toggles for services you want to unsync are indeed turned off. Restarting both devices after making these changes can also help enforce the new settings.
- Unable to Sign Out of iCloud: If you’re having trouble signing out of iCloud on either device, it could be due to existing content that needs to be transferred or removed. Ensure that you’ve backed up any important data before attempting to sign out. If the issue persists, check your internet connection and try signing out again. Sometimes, server-side issues can temporarily hinder your ability to sign out.
- Missing Data After Unsyncing: Unsyncing your iPhone from your iPad might lead to missing data on one device, especially if you were relying on iCloud to keep your information up-to-date across devices. Before unsyncing, consider using alternative methods like AirDrop or third-party cloud services to transfer any important data you wish to retain on both devices.
By addressing these common issues, you can more effectively manage the process to unsync your iPhone from your iPad, ensuring your data is handled according to your preferences. Remember, patience and careful attention to settings will greatly aid in resolving any syncing issues.
To Sum Up
Unsyncing your iPhone from your iPad allows for greater control over your digital life, tailoring your device usage to your specific needs. By following this guide, you can ensure that your devices operate independently, providing privacy, optimizing storage, and enhancing your overall digital experience.
FAQs
1. Will unsyncing delete data from my devices?
Unsyncing your devices does not automatically delete data from either device. It stops the future exchange of data between devices via iCloud. However, any data previously synced will remain on each device unless manually deleted.
2. How can I unsync specific data types, like photos or contacts? To unsync specific data types:
- Go to the Settings app on your device.
- Tap your Apple ID, then iCloud.
- Here, you’ll see switches next to different data types like Photos, Contacts, etc.
- Toggle off the switch for any data type you wish to unsync. This action will stop that specific type of data from syncing between your devices in the future.
3. What happens if I sign out of iCloud on one device?
Signing out of iCloud on one device will remove access to iCloud services such as iCloud Drive, Photos, Contacts, and more on that device. Any iCloud-synced data will no longer be updated on that device. Before signing out, you’ll have the option to keep a copy of some of this data on the device, but it will not sync with your other devices unless you sign back in.
4. Can I still share files between devices after unsyncing?
Yes, you can still share files between devices after unsyncing using AirDrop, email, or third-party cloud services like Dropbox or Google Drive. These methods allow for manual sharing of files without the need for iCloud sync.
5. How often should I check my sync settings?
It’s a good practice to review your sync settings periodically, especially after updating your operating system or installing new apps that may request to sync data. Checking every few months can help ensure that your settings align with your current preferences for privacy and data management.
6. Is it possible to resync my devices later?
Absolutely. If you decide you want to resync your devices, simply go back into your iCloud settings and toggle back on the switches for the data types you wish to sync. If you signed out of iCloud, you would need to sign back in with your Apple ID on the device you wish to resync. Remember, any changes or updates made while devices were unsynced will need to be manually reconciled.


![[SOlVED]Fix the Error of “System UI Isn’t Responding” on Android](https://www.techviewsolution.com/wp-content/uploads/2024/03/fix-system-ui-isnt-responding-error-on-android.png)

![How to Unsync iPhone From iPad [100% solved]](https://www.techviewsolution.com/wp-content/uploads/2024/03/unsync-iphone-from-ipad.png)
